
Studio lights are mainly about control, not just adjusting brightness. You need to master how to shape, diffuse, and balance the light to create the mood and highlight your subject. Changing color temperature and using modifiers like softboxes or barn doors give you more nuanced control. This helps you craft consistent, professional-looking images. If you keep exploring, you’ll discover how combining techniques can turn ordinary lighting into a powerful storytelling tool.

Get school and study supplies delivered free — and shop member deals
- Fast, free delivery on millions of items
- Access to Prime Big Deal Days deals on October 6–7
- Prime Video, Amazon Music and more included
Key Takeaways
- Precise light control involves adjusting brightness, color temperature, and modifiers to shape the scene effectively.
- Modifiers like softboxes and grids help sculpt and diffuse light for desired effects.
- Combining brightness with color temperature adjustments influences mood and enhances subject appearance.
- Mastering lighting tools and techniques enables consistent, intentional storytelling through light.
- Flexibility in control allows quick adaptation to different shooting scenarios and creative goals.
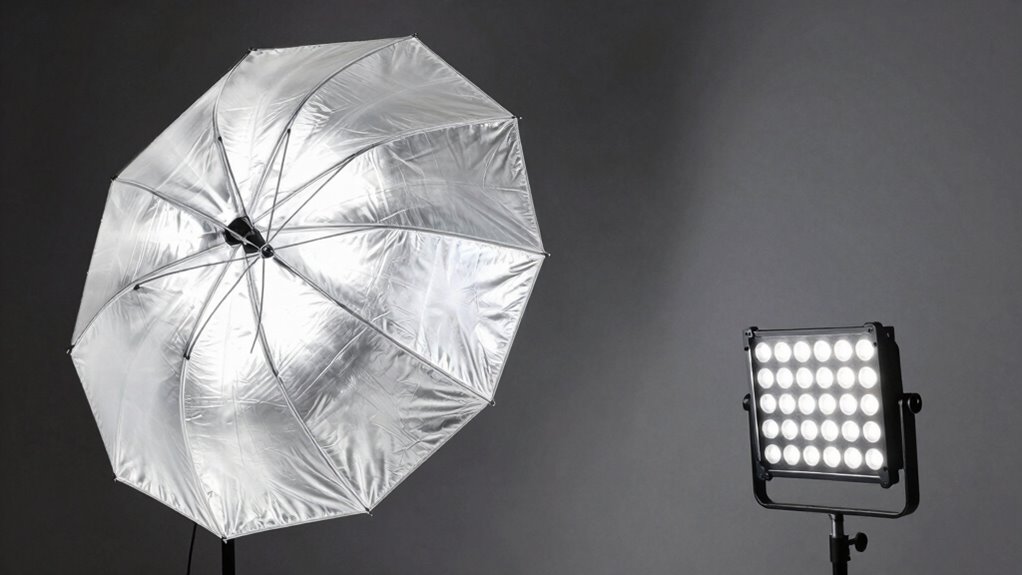
When working in a studio, having precise control over the brightness of your lights can make all the difference in achieving the perfect shot. But more than just adjusting brightness levels, understanding how to manipulate other aspects like color temperature and light modifiers elevates your control. Color temperature influences the mood and tone of your images. A warmer setting, around 3200K, creates cozy, intimate scenes, while cooler temperatures, near 5600K, mimic daylight and produce a crisp, natural look. By adjusting your lights’ color temperature, you guarantee your subject appears exactly as you envision, avoiding unwanted color casts that can distract or diminish your shot’s impact. Recognizing how different light modifiers can shape lighting environments further enhances your ability to craft the desired atmosphere. Light modifiers are equally crucial tools in your arsenal. They shape and diffuse light, giving you the ability to craft precisely the effect you want. Whether you’re using softboxes, umbrellas, or grids, these modifiers help you control the spread and quality of light. Softboxes, for example, produce a gentle, even light that smooths out skin tones and reduces harsh shadows, making them ideal for portraiture. Grids and barn doors, on the other hand, narrow the beam, providing more directional control, which is perfect for highlighting specific areas or creating dramatic effects. These modifiers allow you to sculpt your light, giving you creative freedom to emphasize certain features or craft mood. Controlling brightness is just the starting point. When you combine adjustments to color temperature with the strategic use of light modifiers, you gain a nuanced command over your scene’s lighting environment. This integrated approach assures your lighting complements your subject rather than overpowering it. It also means you can quickly adapt to different scenarios, whether you need a soft, warm glow or a stark, cool edge. Developing an understanding of light control techniques is essential for refining your skills and achieving consistent results. Knowing how to balance light effectively within your scene allows for more natural and visually appealing photographs. In addition, practicing these techniques regularly helps you develop an intuitive sense for light, which is crucial for making quick adjustments on set. Ultimately, the key lies in mastering these tools and concepts, not just turning the lights up or down. You develop an intuitive sense for how each element interacts, enabling you to produce consistent, professional results. By focusing on control over these aspects—rather than just brightness—you elevate your photography, making each shot more intentional and visually compelling. This level of mastery transforms your studio into a dynamic space where lighting enhances storytelling, mood, and clarity, rather than merely illuminating.
As an affiliate, we earn on qualifying purchases.
Frequently Asked Questions
How Do Color Temperature Adjustments Affect Studio Lighting?
Adjusting color temperature directly impacts your studio lighting by influencing color accuracy and mood creation. When you lower the temperature, you get warmer tones, creating a cozy or intimate feel. Raising it produces cooler, bluish hues, which can evoke a sleek, modern mood. By fine-tuning these settings, you guarantee your images have true-to-life colors and the desired emotional tone, giving you better control over your overall visual storytelling.
What Types of Modifiers Enhance Light Control?
You can enhance light control with modifiers like softboxes and grids that shape and diffuse light. Softboxes create gentle, even light through light diffusion, reducing harsh shadows, while grids focus and direct light precisely. Barn doors and snoots also help control light spill and shape the beam. These tools give you the power to craft your scene, turning raw light into a controlled, artistic element that complements your vision.
How Does Light Placement Influence Shadows and Highlights?
You influence shadows and highlights by carefully positioning your lights. Placing lights higher and at an angle creates softer shadows and reduces harshness, making shadows more diffused. Moving lights closer intensifies highlights, while shifting them sideways alters shadow sharpness. By adjusting placement, you *guarantee* shadow softness and highlight intensity, helping shape the mood and detail of your subject. Precise light placement ensures your desired contrast and texture come through clearly.
Can Studio Lights Be Synchronized With Cameras?
Did you know that over 80% of professional studios synchronize lights with cameras? Yes, studio lights can be synchronized with cameras to prevent issues like light flicker, especially with LED lights. This is achieved through power cycling or using specialized sync cables and triggers. By doing so, you guarantee consistent lighting and avoid flickering in your footage, giving you smooth, professional results every time you shoot.
What Safety Precautions Are Essential When Handling Studio Lights?
When handling studio lights, you need to prioritize safety by wearing appropriate safety equipment like gloves and goggles. Always guarantee electrical grounding to prevent shocks. Before setting up, inspect cables for damage and keep the area dry to avoid electrical hazards. Turn off and unplug lights when adjusting or moving them, and never bypass safety features. These precautions protect you and ensure a safe, efficient photography or filming session.
As an affiliate, we earn on qualifying purchases.
Conclusion
Remember, studio lights are like the steering wheel of your photography journey—more about control than just brightness. When you master how to shape and adjust your lights, you’re wielding the brush to paint your perfect shot. Don’t just chase after raw power; learn to tame it. With careful control, your images will shine brighter and tell stories more vividly, turning your studio into a canvas where your creativity can truly flourish.
As an affiliate, we earn on qualifying purchases.
As an affiliate, we earn on qualifying purchases.
Halloween Picks
halloween
As an affiliate, we earn on qualifying purchases.