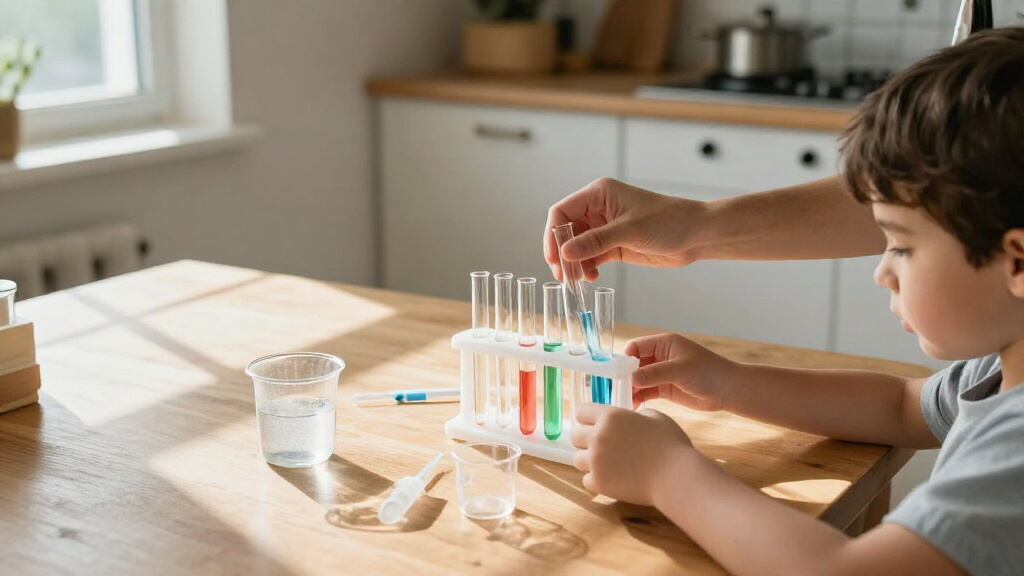
Use this guide to choose an educational science kit for a child, prepare a safe workspace, and complete one experiment together. It is written for parents, caregivers, and educators with little or no science teaching experience. Plan for about 30-60 minutes for choosing the kit, preparing materials, and doing an experiment; some kits need extra time for growing crystals or observing changes.

Prime made for students and young adults
- Fast, free delivery for dorm and study essentials
- Prime Video and Amazon Music included
- Member-only deals
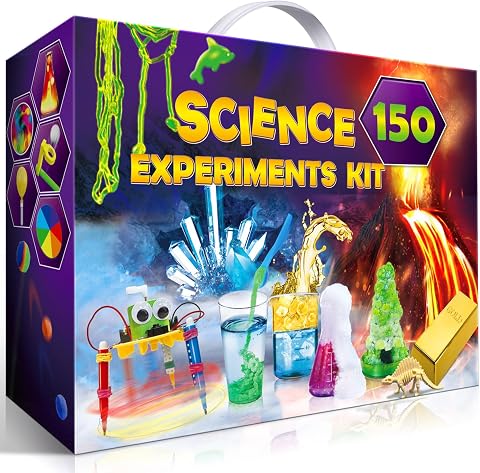
UNGLINGA 150-Experiment Science Kit for Kids
- ✔ Brand: UNGLINGA
- ✔ Recommended age: 8 years and up
- ✔ Experiments: Up to 150

Doctor Jupiter Preschool Science Kit for Ages 3–5
- ✔ Brand: Doctor Jupiter
- ✔ Age range: 3 years and up; designed for ages 3–5
- ✔ Activities: More than 100

National Geographic Science Magic Kit for Kids, 100+ Experiments
- ✔ Brand: Blue Marble
- ✔ Age range: 8 years and up
- ✔ Included magic experiments: 20
Difficulty: Beginner | Time: 30-60 minutes for setup and one experiment
What You’ll Need
Tools & Materials:
- A science kit suited to the child’s age and interests
- The kit’s instruction booklet and all listed components
- A clear, washable work surface
- Any household materials specified by the instructions
- Paper and pencil or a notebook for recording predictions and observations
- Safety glasses or other protective equipment if the kit instructions call for them
Knowledge:
- Ability to follow the kit instructions and supervise the child
- Basic understanding that experiments involve observing results, which may differ from predictions
Check the package and kit instructions before buying or opening it. Confirm the recommended age, number of experiments, adult supervision guidance, and whether the kit requires household supplies. Read the safety information and look over each activity before inviting the child to begin. Do not use a kit with missing safety directions or components.
UNGLINGA 150-Experiment Science Kit for Kids
UNGLINGA is our most versatile recommendation for children ages 8 and up who want to move between different kinds of science. Its activities cover chemistry, physics, earth science, and surface tension, giving curious kids more room to find a topic that sticks than the preschool-focused Doctor Jupiter kit. An illustrated, step-by-step manual helps make that range approachable, and the included tools and materials mean the kit is not just a list of ideas to recreate from scratch.Its large stated activity count is appealing, but families should read it as a menu of projects rather than a promise that every experiment is self-contained. Some activities call for common household items, so an adult may need to check instructions and gather supplies before starting. That makes UNGLINGA less plug-and-play than a kit centered on supplied trick materials, such as National Geographic’s 20 magic experiments. Still, UNGLINGA has the broader educational scope for children who want to try several fields, and goggles are among the included equipment. Younger children may need more help than the age recommendation suggests, while older kids seeking advanced, open-ended projects may want more depth than a guided kit provides.
Pros:
- Spans chemistry, physics, earth science, and surface tension.
- Illustrated, step-by-step instructions support guided learning.
- Includes experiment tools and materials, including goggles.
- Offers a wide range of activities for exploring different interests.
Cons:
- Some projects require additional household items.
- The age recommendation starts at 8, so younger children may need close adult guidance.
- A broad activity count does not guarantee that every project is ready to begin with kit contents alone.
Best for: Children ages 8 and up who want a guided introduction to multiple science topics and are comfortable asking for help gathering occasional household supplies.
Not ideal for: Preschoolers, children who need every activity’s materials supplied, or older learners looking for advanced experiments with less step-by-step direction.
Bottom line: We recommend UNGLINGA as the most balanced school-age option for families who value subject variety and can supply a few extra household materials.
“We recommend UNGLINGA as the most balanced school-age option for families who value subject variety and can supply a few extra household materials.”
Doctor Jupiter Preschool Science Kit for Ages 3–5
Doctor Jupiter is the clear age-fit choice for children beginning to explore science. Its activities use colors, bubbles, water, motion, sound, and simple reactions, making abstract ideas easier to approach through visible and sensory play. The beaker, cups, stirring sticks, color mixing tray, funnel, spray bottle, and other listed components give families a varied set of tools for exploring these themes. Compared with UNGLINGA and National Geographic, this kit is designed specifically for preschool-aged children, rather than adapting a school-age format for younger users.The tradeoff is that this is an activity to explore together, not a kit intended to keep a preschooler working independently. Illustrated instructions and online activity access can help an adult lead the experience, but families should expect to participate and supervise. Older children may outgrow the level of the activities; the age-specific design that makes this more suitable than UNGLINGA for preschoolers also makes it less compelling for school-age kids. Its many activities provide variety, but the supplied description does not identify a detailed count of projects using only included materials. We would choose it for shared early discovery, not for a child seeking increasingly challenging solo experiments.
Pros:
- Activities introduce science through colors, bubbles, water, motion, and sound.
- Designed specifically for a preschool age range.
- Includes a varied selection of experiment tools and components.
- Illustrated instructions and online activity access support adult-led exploration.
Cons:
- Activities are intended for parent-and-child exploration rather than fully independent use.
- Older children may find the preschool activities less suitable.
- The activity count alone does not clarify how many projects use only supplied materials.
Best for: Preschool children ages 3–5 who enjoy hands-on sensory play with an adult guiding the activities.
Not ideal for: Older children wanting more challenging concepts, or families looking for a kit designed for independent use.
Bottom line: We would choose Doctor Jupiter when age-appropriate sensory discovery and adult-child participation matter more than independent, school-age experimentation.
“We would choose Doctor Jupiter when age-appropriate sensory discovery and adult-child participation matter more than independent, school-age experimentation.”
National Geographic Science Magic Kit for Kids, 100+ Experiments
National Geographic gives science a theatrical hook: children perform experiments as magic tricks, then use an illustrated guide to learn the science behind each one. That pairing suits kids who like demonstrations, storytelling, or showing a result to family members. The kit supplies materials for 20 magic experiments, plus a wand and white gloves to reinforce the performance format. Compared with UNGLINGA’s wider mix of science fields, this is a more focused experience; compared with Doctor Jupiter, it is aimed at children ages 8 and up rather than preschoolers.The 100-plus headline count combines the 20 supplied magic experiments with a bonus booklet containing more than 85 additional experiments. Those bonus activities use common household items, so the count does not mean the kit contains materials for every project. This distinction matters for families expecting a ready-to-go box: UNGLINGA also asks for some household supplies, but its described value is a broader topic mix, while National Geographic’s central appeal is the performance format. We would skip this option if a child prefers quiet, open-ended exploration or if adults want every activity’s materials included. The listed item dimensions are incomplete, which limits advance judgment of its storage footprint.
Pros:
- Frames hands-on activities as magic tricks that children can perform.
- Illustrated guide explains the science behind the included tricks.
- Includes materials for 20 magic experiments, a wand, and white gloves.
- Bonus booklet adds more than 85 household-item experiments.
Cons:
- The supplied materials cover 20 experiments; bonus activities rely on common household items.
- The performance focus is narrower than UNGLINGA’s broad science-topic mix.
- The provided item dimensions are incomplete.
Best for: Children ages 8 and up who enjoy performing demonstrations and want explanations of the science behind each trick.
Not ideal for: Families seeking an all-in-one supply set for every listed experiment, or children who prefer broad, non-performance science activities.
Bottom line: We recommend National Geographic for children motivated by performing science, provided families understand that the bonus activities depend on supplies from home.
“We recommend National Geographic for children motivated by performing science, provided families understand that the bonus activities depend on supplies from home.”
As an Amazon Associate we earn from qualifying purchases.
Before You Start
Choose a time when you can stay with the child for the full activity. Put food, drinks, pets, and unrelated items away from the work area. Follow the kit’s age guidance and supervision instructions, and keep small parts away from children who may put them in their mouths. Do not taste, smell closely, mix, heat, or dispose of materials in a way the instructions do not allow. If a child has a relevant allergy or sensitivity, check all listed materials first.
Step-by-Step Instructions
Step 1: Match the kit to the child
Choose a kit that fits the child’s age, reading ability, interests, and patience. Look for a subject they already enjoy, such as space, plants, animals, building, or simple chemistry. Check the age range and decide whether the child can do most tasks with your supervision or will need you to handle setup and reading.
Review how many activities the kit includes and how long they take. A kit with short experiments may suit a first-time learner; a longer project can work well if the child enjoys returning to an activity over several days.
Tip: Read the component list and activity descriptions before purchase. A kit may rely on household supplies that are not included.
Check: The kit matches the child’s interests and abilities, and you know how much adult help and time it will need.
Step 2: Read the safety and activity instructions
Read the safety directions, then choose one experiment before opening or assembling materials. Check every step, warning, and disposal instruction. Identify which tasks the child can do and which you must perform, such as measuring, handling fragile parts, or using equipment that the kit says requires an adult.
Do not combine instructions from different activities. Use only the materials and amounts specified for the experiment you selected.
Tip: If the directions are unclear or a safety item is missing, pause and contact the kit maker for guidance. Select another activity if you cannot confirm that it can be done safely.
Check: You can explain the experiment’s sequence, safety precautions, and cleanup before the child starts.
Step 3: Gather materials and prepare the workspace
Set out the kit components and household supplies listed for the experiment. Check them against the instructions before beginning. Cover the work surface if the activity could spill or stain, and place a waste container and cleanup supplies nearby if the directions call for them. Put on the protective equipment specified by the kit.
Keep unused kit parts and other materials out of reach so they do not get mixed into the activity. Make room for the child to see and reach the materials without leaning across containers or tools.
Tip: Use a stable, washable surface with enough light. Keep the experiment away from food preparation areas.
Check: All required materials are present, the workspace is clear, and safety equipment is ready.
Step 4: Ask for a prediction
Tell the child what the experiment will explore in one or two simple sentences. Ask what they think will happen and why. Write down the prediction, or ask the child to draw it, before starting. Treat the answer as a starting idea rather than something that must be correct.
For example, ask, “What do you think will happen when we follow these steps?” Avoid giving away the result if the instructions do not require it.
Tip: A specific question helps the child focus: ask what may change, what may stay the same, or what they expect to observe.
Check: The child has stated or recorded a prediction they can compare with the result.
Step 5: Complete the experiment one step at a time
Follow the kit instructions in order. Read one step aloud, then let the child do the parts that are appropriate for their age and the safety directions. Measure amounts carefully when the instructions specify them, and pause to check the setup before moving on.
Do not rush, add extra ingredients, or repeat a step unless the booklet tells you to. If the activity includes a waiting period, record when it began and follow the specified observation schedule.
Tip: Let the child do safe tasks such as sorting, counting, drawing, or recording. Keep adult-only tasks in your hands as directed by the kit.
Check: The experiment was completed in the stated order with the required materials and amounts.
Step 6: Observe and record what happens
Invite the child to describe what they can see, hear, or measure, using only senses and tools the kit instructions permit. Record observations in words, drawings, or a simple table. Note when a change happens and how it compares with the starting point.
Ask open questions such as, “What changed?” and “What stayed the same?” Keep observations separate from explanations: “The water changed color” describes what happened; “The material caused the color change” is a possible explanation to discuss.
Tip: If the result takes hours or days, follow the booklet’s timing and storage directions. Do not leave materials where a child or pet can reach them.
Check: The child has recorded at least one observation and compared it with the original prediction.
Step 7: Discuss the result and clean up
Compare the observations with the prediction. Ask what the result suggests and whether anything about the experiment could explain a different outcome. Keep the explanation within what the kit teaches; it is fine to say that one experiment gives clues rather than proving every case.
Dispose of materials and clean tools exactly as the instructions direct. Wash hands after handling kit components, even if no visible spill occurred. Store reusable parts and the booklet together once everything is dry and safe to put away.
Tip: Avoid calling an unexpected result a failure. Ask the child what they learned from it and what they would observe more carefully next time.
Check: The child can describe what happened, and the materials and workspace have been cleaned up according to the kit directions.
Common Mistakes to Avoid
- Choosing a kit based only on its pictures or advertised experiment. — Check the age guidance, activity length, supervision needs, included components, and required household materials before choosing.
- Starting before reading the safety directions and full activity. — Review the instructions first so you can prepare the right workspace and identify adult-only tasks.
- Changing quantities or adding extra materials to make the result more dramatic. — Follow the specified materials and amounts. Changing them can affect the result and may create a safety risk.
- Focusing only on whether the prediction was right. — Ask the child to describe observations and compare them with the prediction. An unexpected result can still teach them something.
Troubleshooting
Problem: A required household material or kit component is missing.
Solution: Pause and check the booklet for an approved substitute. Use one only if the instructions name it; otherwise, contact the kit maker or choose a different activity.
Problem: The result looks different from the booklet’s example.
Solution: Check whether the steps, amounts, timing, and materials matched the directions. Record what happened, then review the kit’s troubleshooting notes. Do not add extra materials or repeat the activity until you have checked the safety directions.
Problem: The child loses interest before the experiment is finished.
Solution: Pause at a safe stopping point if the instructions allow it. Explain what needs to happen next and when to return. For a future session, choose an activity with a shorter setup or observation time.
Problem: A spill, skin contact, or other unexpected exposure occurs.
Solution: Stop the activity and follow the kit’s safety instructions. Use the listed first-aid guidance and contact the appropriate local medical or poison advice service if the instructions call for it or symptoms occur. Keep the packaging available so you can identify the materials.
What Success Looks Like
The activity is complete when the child has followed the kit’s steps with suitable supervision, made and recorded at least one observation, compared the result with a prediction, and taken part in cleanup. The result does not need to match a photograph exactly. A useful outcome is one the child can describe accurately and discuss using evidence from what they observed.
Next Steps
Store reusable kit parts and instructions together, and keep any remaining materials as the label directs. If the child wants to continue, select another activity from the same kit and ask them to make a new prediction. For projects that require repeated observations, mark the next observation time on a calendar. Replace depleted components only with items approved by the kit maker.
Frequently Asked Questions
How do I know if a science kit is right for my child’s age?
Use the age range on the package as a starting point, then review the reading, measuring, assembly, and supervision required. Choose a kit the child can take part in safely with the help available.
Do I need to teach the science lesson before starting?
No. Read the activity first so you can guide the steps and safety rules. Let the experiment introduce the idea, then use the booklet and the child’s observations to discuss what happened.
What if the experiment does not work as shown?
Record the actual result and check the steps, amounts, timing, and materials against the instructions. Consult the booklet’s troubleshooting guidance. A different result can still prompt useful observation and questions.
Can my child do the experiment alone?
Follow the kit’s age and supervision directions. Stay present whenever the instructions require adult help, and keep all materials within your supervision during the activity.
How should we store leftover kit materials?
Use the storage and disposal directions on the packaging or in the booklet. Keep materials in their labeled containers, away from children and pets, and do not transfer them to food containers.